
You have a collection of plain terracotta pots sitting in a corner of your balcony or garden shed. They are not broken. They are not ugly. They are just… boring. And somehow, every time you look at them, you feel like they could be so much more.
The good news is that a few dollars worth of paint and an afternoon of your time can completely change that. Pot painting ideas have taken over Pinterest and home decor spaces for good reason. They are cheap, satisfying, and the results genuinely make your home look more put-together and personal.
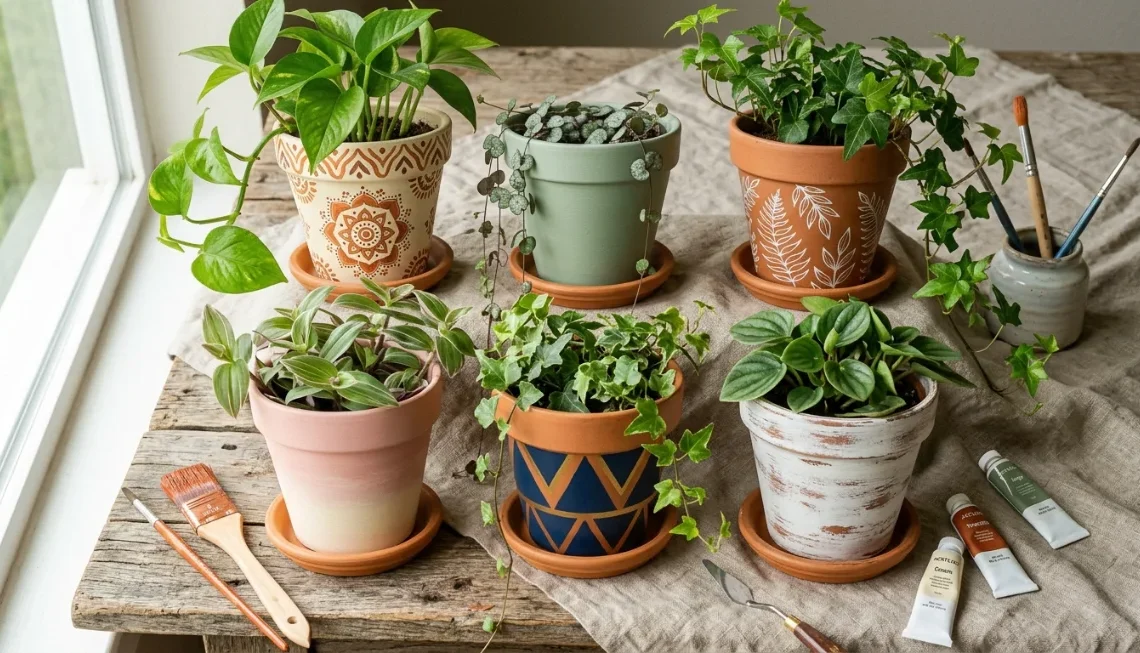
Whether you want something minimal and modern for a living room shelf, something colorful and playful for a patio, or a thoughtful handmade gift for someone you love, this guide has something for you. These 20 pot painting ideas cover every skill level, style preference, and budget.
No expensive tools. No professional art skills required. Just paint, a few brushes, and a little patience.
What You Need Before You Start Painting
Before jumping into pot painting ideas, it helps to gather the right supplies. You do not need much, but the right materials make a big difference in how the final result looks and how long it lasts.
Supplies for Terracotta Pot Painting:
- Terracotta or clay pots (any size works)
- Acrylic paint for pots is the most popular choice since it adheres well, dries quickly, and comes in hundreds of colors
- Chalk paint if you want a matte, vintage, or farmhouse-style finish
- Primer or clay pot sealer for the inside and outside surface
- Flat and round paintbrushes in different sizes
- Painter’s tape for clean geometric lines
- Outdoor sealant or Mod Podge Outdoor to protect finished designs
- A damp cloth to wipe down pots before you begin
A quick note on paint choices: Acrylic paint is the most beginner-friendly option for painted flower pots. It sticks to clay surfaces without slipping, and you can mix colors easily. Chalk paint needs fewer coats and gives a naturally matte look. For outdoor planters, make sure to choose a paint labeled water-resistant or for outdoor use. A UV-resistant sealant over the finished pot makes colors last much longer in direct sunlight.
How to Paint Flower Pots: A Simple Prep Guide
Knowing how to paint flower pots properly starts with good preparation. Skipping prep is one of the most common mistakes beginners make, and it often leads to peeling paint or dull colors.
Step 1: Clean and Dry the Pot Wipe down the surface with a damp cloth to remove dirt, dust, and any residue. Let the pot dry completely before applying anything. Terracotta absorbs moisture, so painting a damp pot causes paint to bubble or peel later.
Step 2: Seal the Inside (Optional but Recommended) If you plan to plant directly in the pot, apply a clay pot sealer to the inside. This prevents moisture from seeping through and keeps the painted exterior in better condition over time.
Step 3: Apply a Base Coat A thin primer coat or base color helps your design pop and ensures even coverage. For chalk paint, this step is often not necessary since it covers well on its own. For regular acrylic paint, a white or light-colored base coat reduces the number of layers needed.
Step 4: Paint Your Design Apply thin, even coats rather than one thick layer. Let each coat dry before adding the next. For most acrylic pot painting designs, two or three coats give a clean, solid finish.
Step 5: Seal the Outside Once your design is complete and fully dry, apply a clear sealant to protect the colors. For outdoor planter painting, choose a waterproof or water-resistant formula. For indoor plant pot decor, a basic matte or glossy sealant works perfectly.
20 Creative Pot Painting Ideas for Every Style
1. Solid Color Block
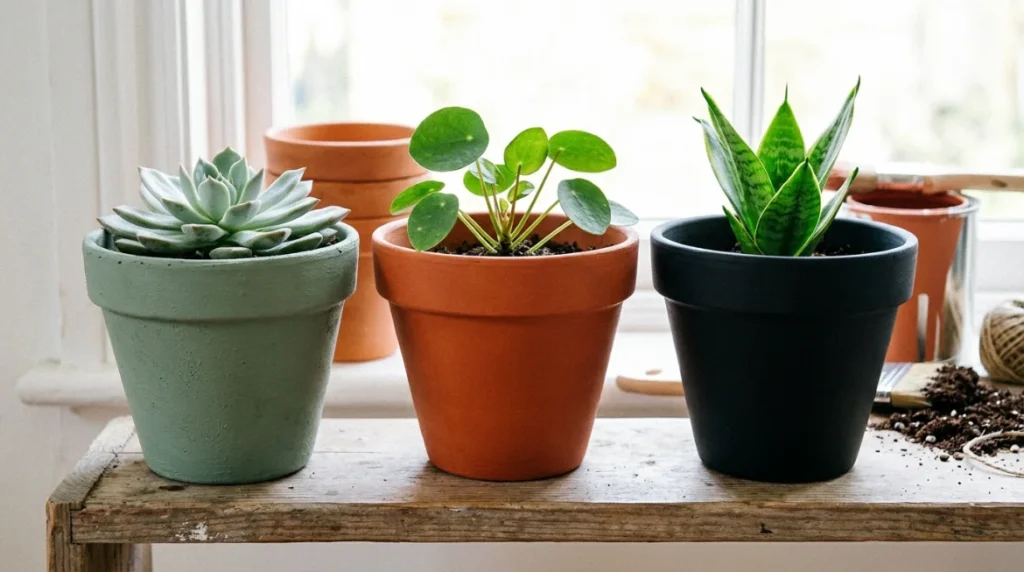
This is the simplest and most satisfying starting point for anyone new to DIY pot painting. Pick one bold, beautiful color and paint the entire pot. That is it. A terracotta pot painted in dusty sage, terracotta orange, or matte black looks completely different from a plain unpainted one. Solid-color painted plant pots are incredibly versatile and work with nearly any home decor style.
Tip: Use chalk paint for a modern matte finish or regular acrylic paint for a more vibrant look.
2. Ombre and Gradient Effect
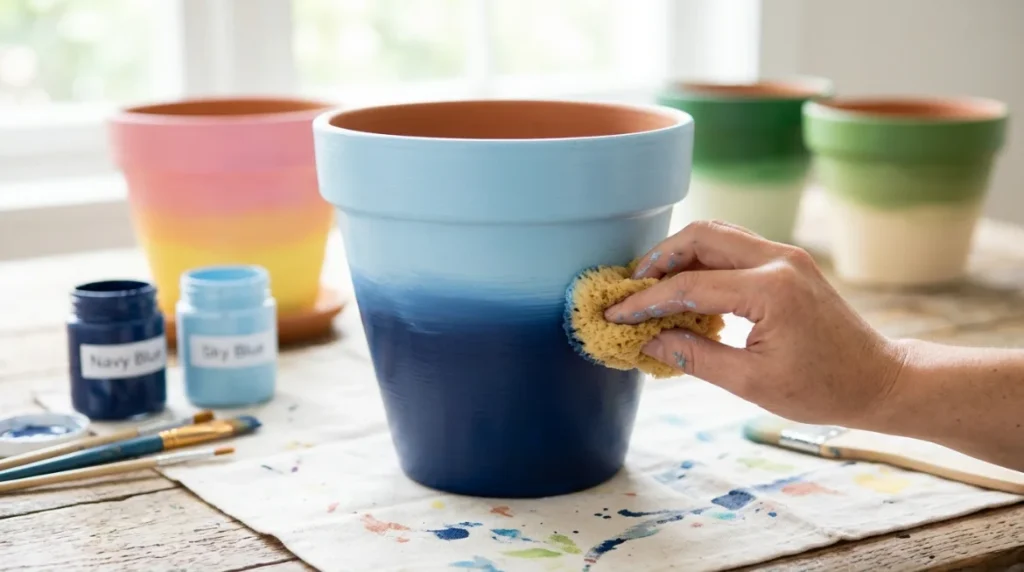
One of the most popular easy painted pot designs on Pinterest, ombre involves blending one color into another on the surface of the pot. You can go from light to dark within the same color family, or mix two contrasting shades for a bold look.
To do this, paint the bottom half of the pot with the darker color and the upper half with the lighter one. While both layers are still slightly wet, blend them together where they meet using a dry brush or sponge. It takes a bit of practice but looks stunning when done.
Tip: Keep lighter paint on top. Darker shades on the bottom make the pot look grounded and well-balanced.
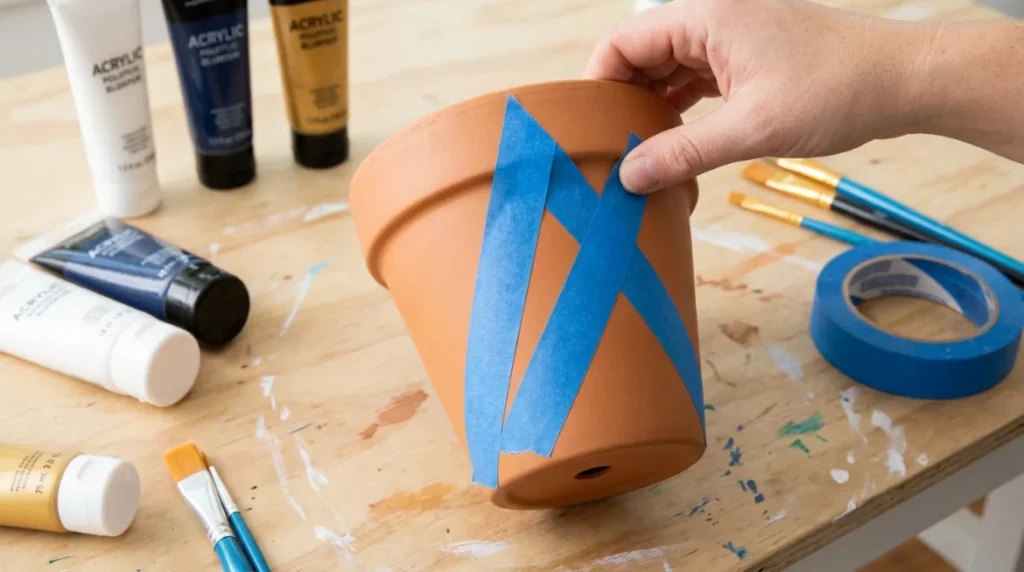
3. Geometric Patterns with Painter’s Tape
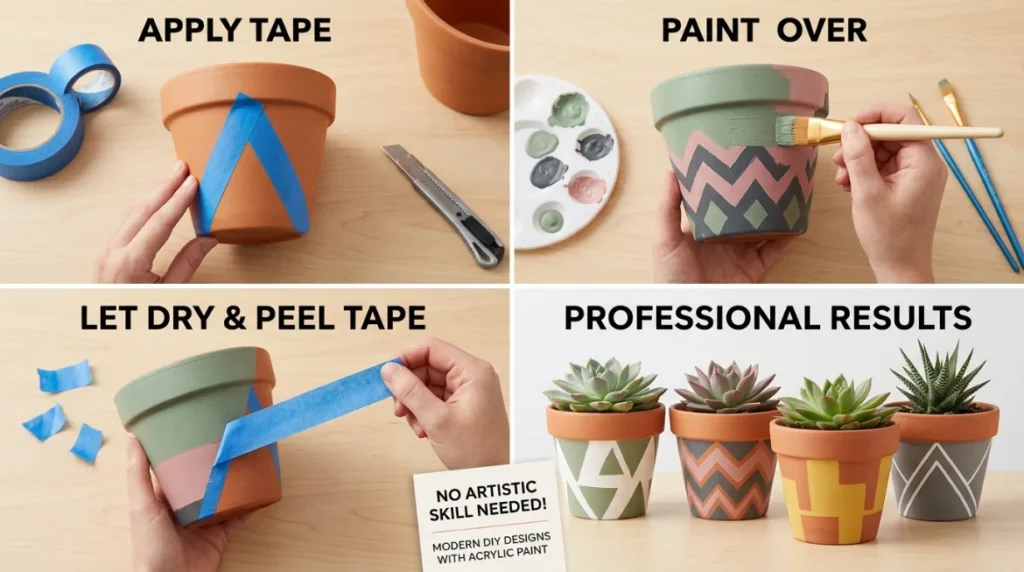
If you want modern painted planter designs without any freehand drawing skills, painter’s tape is your best friend. Apply strips of tape to create triangles, diamonds, chevrons, or abstract shapes. Paint over the whole pot, let it dry, then peel the tape to reveal clean lines.
This is one of the most DIY-friendly pot painting ideas with acrylic paint. The results look professional, and no artistic skill is needed.
Tip: Press tape edges down firmly before painting to prevent bleeding. Peel the tape slowly while the paint is still slightly wet for the cleanest lines.
4. Whitewash and Vintage Finish
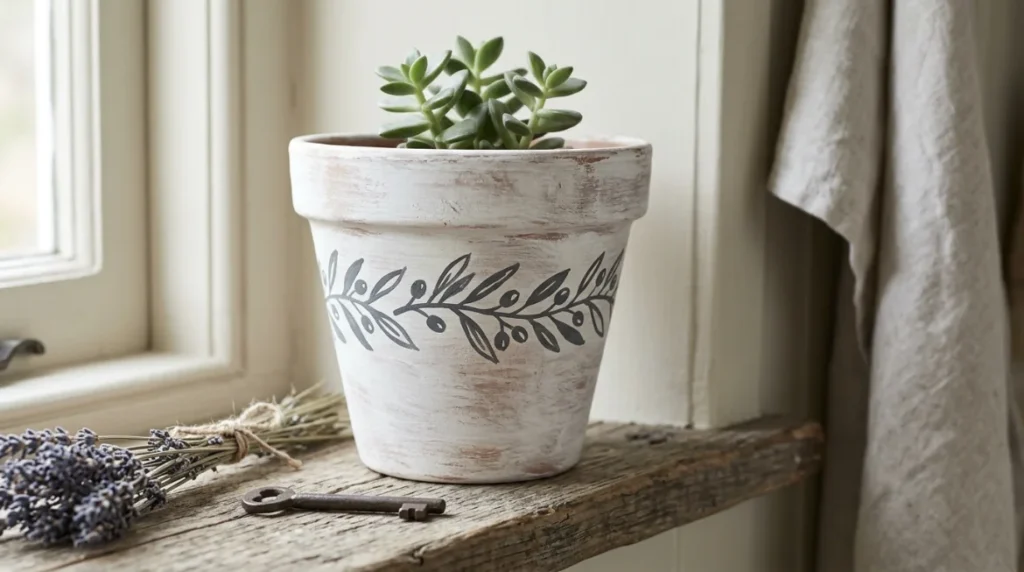
A whitewashed terracotta pot has a soft, aged look that works beautifully in farmhouse, cottage, and Scandinavian-inspired spaces. Dilute white acrylic or chalk paint with water to create a thin wash. Brush it over the pot and immediately wipe off the excess with a damp cloth. The clay underneath shows through slightly, giving an organic, time-worn effect.
This is one of the easiest terracotta pot painting ideas for anyone who prefers a subtle, natural aesthetic over bold colors.
Quick Comparison: Popular Pot Painting Styles at a Glance
| Design Idea | Skill Level | Paint Type | Best For | Budget Range |
|---|---|---|---|---|
| Solid Color Block | Beginner | Acrylic / Chalk | Indoor & Outdoor | Under $5 |
| Ombre / Gradient | Beginner | Acrylic | Living Room Display | $5 – $10 |
| Geometric Pattern | Intermediate | Acrylic + Painter’s Tape | Modern Home Decor | $8 – $15 |
| Boho Mandala | Intermediate | Acrylic Fine Brush | Indoor Shelves | $10 – $18 |
| Botanical / Leaf Art | Intermediate | Acrylic / Watercolor | Indoor Plant Decor | $10 – $20 |
| Whitewash / Vintage | Beginner | Chalk / Diluted Acrylic | Farmhouse / Rustic Style | Under $5 |
| Hand-Painted Faces | Advanced | Acrylic Fine Detail | Gift / Statement Decor | $15 – $25 |
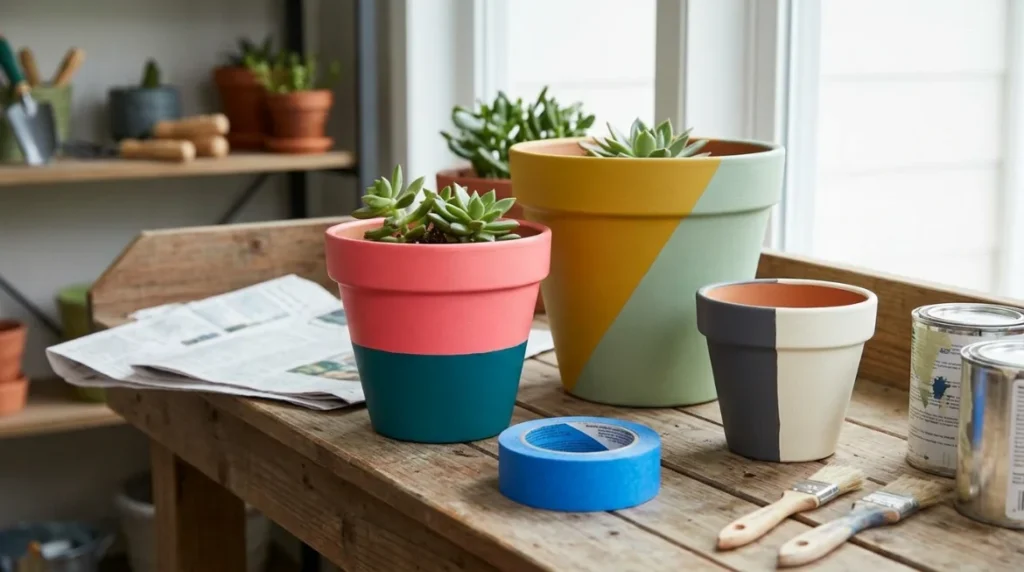
5. Color Blocking with Two or Three Colors
Color blocking is a modern design technique where two or three colors are painted in distinct, contrasting sections. You can split the pot horizontally, vertically, or diagonally using painter’s tape.
This works brilliantly as a DIY planter makeover project because you can use leftover paint from other home projects. No need to buy new supplies.
6. Boho Mandala Design
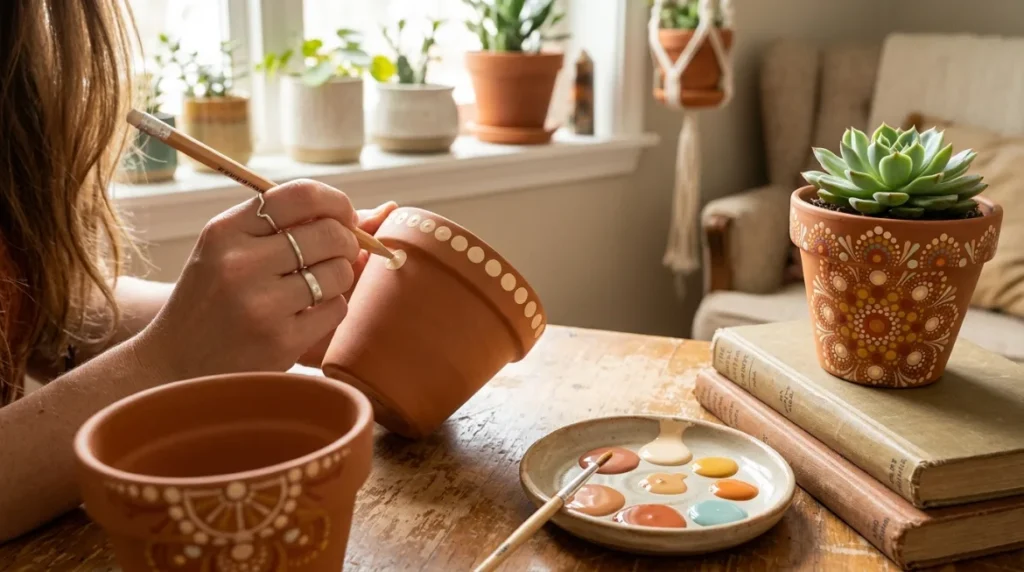
Mandalas are circular, symmetrical patterns built from repeating shapes. They look complex but are actually built from simple dots and lines made with a round brush or the back of a pencil dipped in paint.
Boho-style painted terracotta planters with mandala patterns look beautiful on indoor shelves, windowsills, and coffee tables. Earthy tones like terracotta, cream, burnt orange, and mustard feel warm and inviting. Adding a ring of dots around the rim is an easy way to start before working inward.
Tip: Use white or gold paint on a dark base for a striking contrast that photographs beautifully.
7. Botanical and Leaf Prints
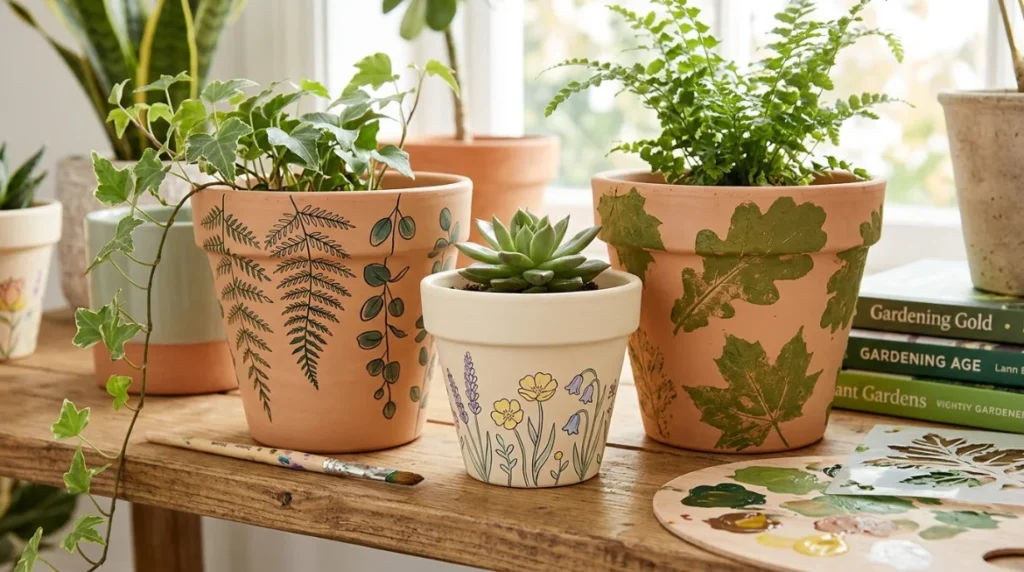
Botanical-themed hand painted pots are among the most popular indoor planter painting ideas. Paint delicate outlines of leaves, ferns, eucalyptus branches, or wildflowers directly onto the pot surface.
If freehand drawing feels too intimidating, use a stencil. You can also press actual leaves dipped in paint onto the surface for an organic stamped effect. This is one of the best beginner-friendly pot painting ideas for those who love nature-inspired aesthetics.
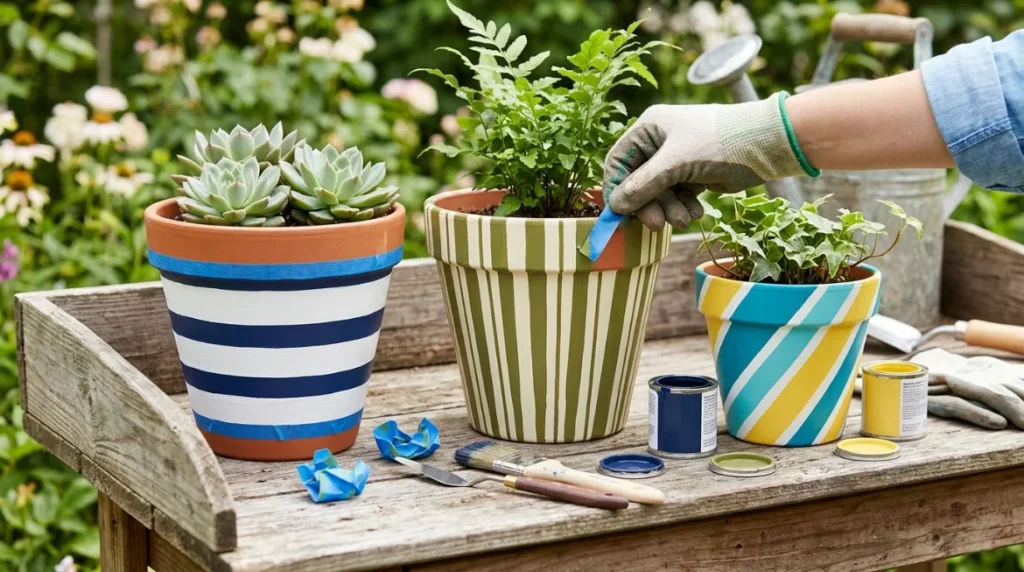
8. Striped Pots
Horizontal stripes look classic and timeless. Use painter’s tape to mark evenly spaced lines, then paint alternating bands in two or more colors. Thin stripes look refined and minimal, while thicker stripes feel bold and graphic.
Vertical stripes make a pot look taller. Diagonal stripes feel more playful and dynamic.
9. Polka Dots
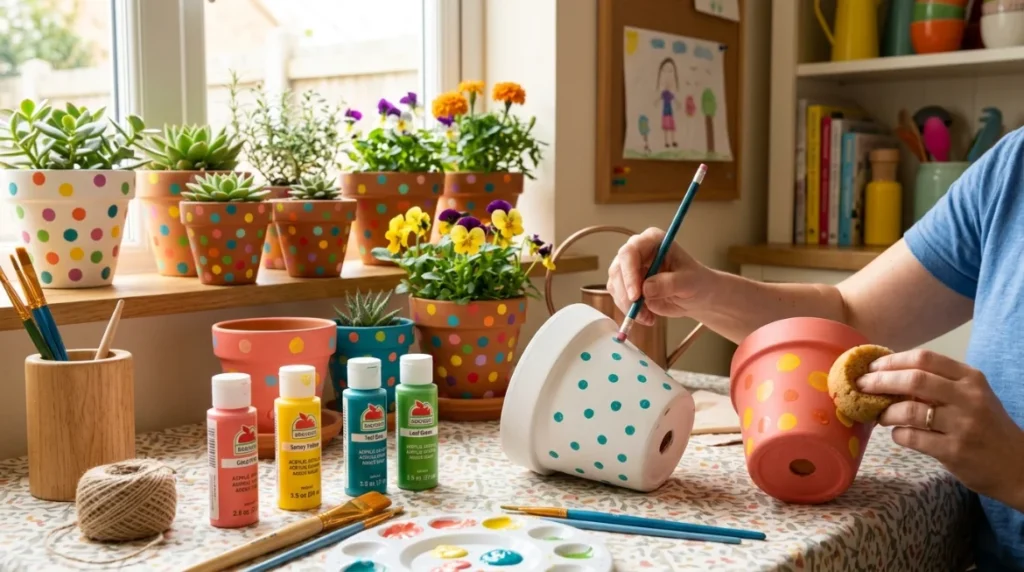
Polka dot painted flower pots are cheerful, easy to create, and work for both indoor and outdoor settings. Use the eraser end of a pencil or a round sponge to stamp uniform dots across the surface. Vary the dot sizes for a more organic, scattered look.
This is one of the cutest pot painting ideas for a child’s room, nursery, or a colorful kitchen shelf.
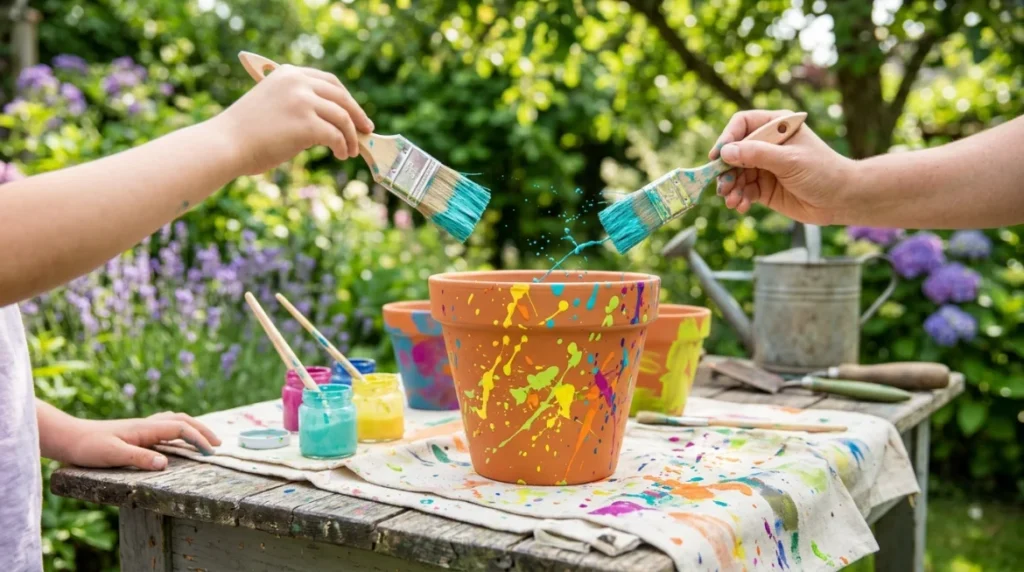
10. Abstract Paint Splatter
Inspired by modern art, paint splatters are effortless to create and genuinely fun to do. Dip a stiff brush into thinned paint and flick it onto the pot surface. Repeat with different colors for an energetic, artistic result.
This is an ideal outdoor pot painting idea for gardens where you want a creative, carefree look. It also doubles as a fun craft activity to do with kids.
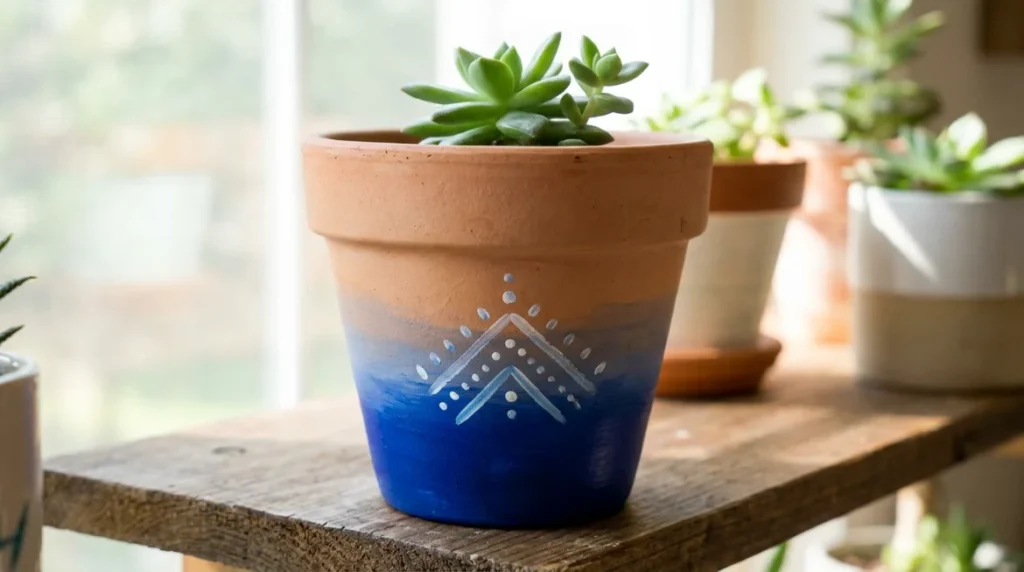
11. Ombre Dip-Dye Style
This technique mimics the look of a fabric dip-dye. Paint the bottom third of the pot in a saturated color, blend upward, and leave the top natural terracotta. The result looks deliberate and modern without requiring any precision.
Works especially well with deep jewel tones like navy, forest green, burgundy, or cobalt blue painted over a terracotta base.
12. Sponge Texture Painting
A piece of sea sponge dipped in paint and dabbed onto the pot surface creates a beautiful mottled, textured effect that resembles stone or aged plaster. Use two to three closely related colors for depth.
This is one of the most forgiving DIY garden crafts techniques because imperfections only add to the charm.
13. Monogram or Lettering
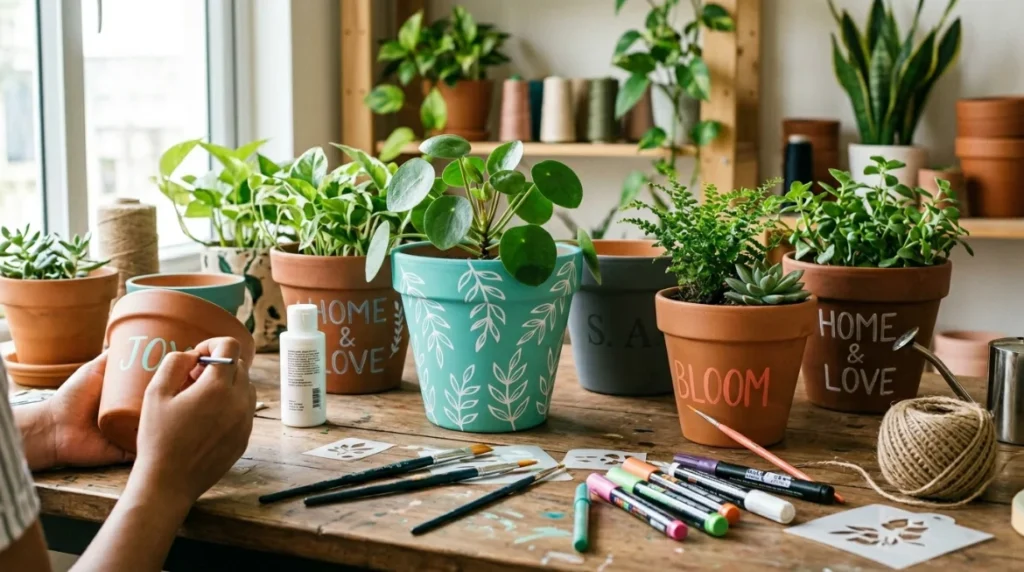
Personalized plant pots make wonderful gifts. Paint a name, initials, a meaningful word, or a simple phrase onto the surface of the pot. Use stencil letters for clean results, or freehand the lettering with a fine-tipped brush if you have steady hands.
Chalk paint markers work especially well for adding lettering without the mess of a brush.
14. Animal Face Designs
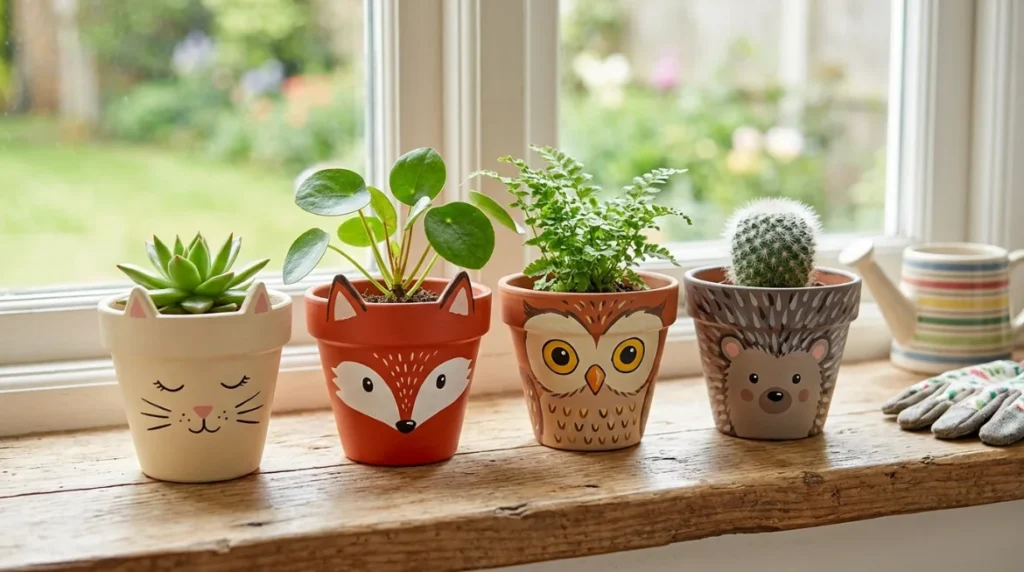
Turn a pot into a character by painting an animal face on the front. Cats, owls, foxes, and hedgehogs are popular choices. These work particularly well on smaller pots and make adorable desk plants or windowsill displays.
These are among the most-saved cute flower pot painting ideas on Pinterest, especially for children’s rooms or playful kitchen shelves.
15. Galaxy and Night Sky Pattern
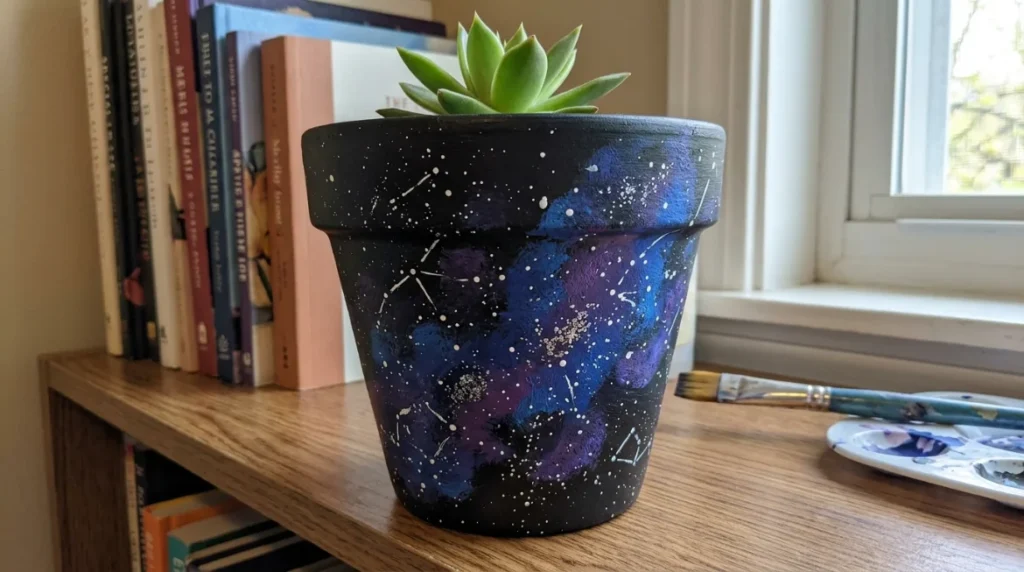
A dark background painted in navy or black, layered with sponged purple, blue, and white dots, creates a dreamy galaxy effect. This is perfect for a bedroom, home office, or teen’s room.
Use a dry sponge to add bursts of purple and blue, then dot fine white paint using the tip of a skewer or pin to create stars.
16. Mosaic-Inspired Painted Tiles
Use painter’s tape to section the pot surface into small tiles or irregular mosaic shapes. Paint each section a different color. When the tape comes off, you have a colorful painted planter that looks like handmade ceramic tilework.
This is one of the most unique planter painting ideas for home decor and works well in Mediterranean, Moroccan, or eclectic-style interiors.
17. Recycled and Upcycled Pot Makeover
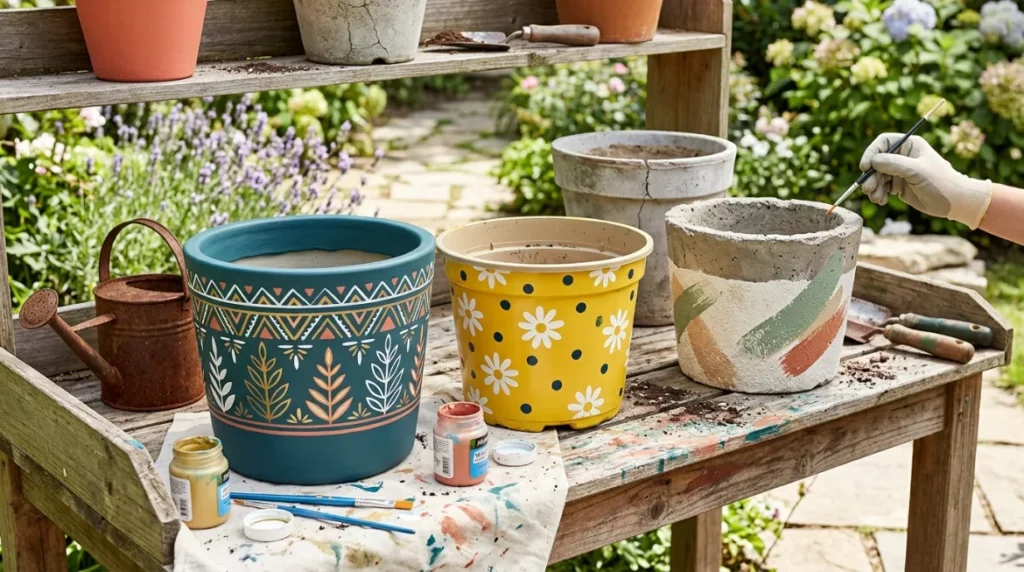
Old plastic or cement pots that are worn or faded are perfect candidates for a complete makeover. A base coat of spray paint followed by hand-painted details can completely transform a tired planter into something fresh.
Recycled pot painting ideas are budget-friendly, sustainable, and one of the most satisfying DIY projects you can complete in a single afternoon.
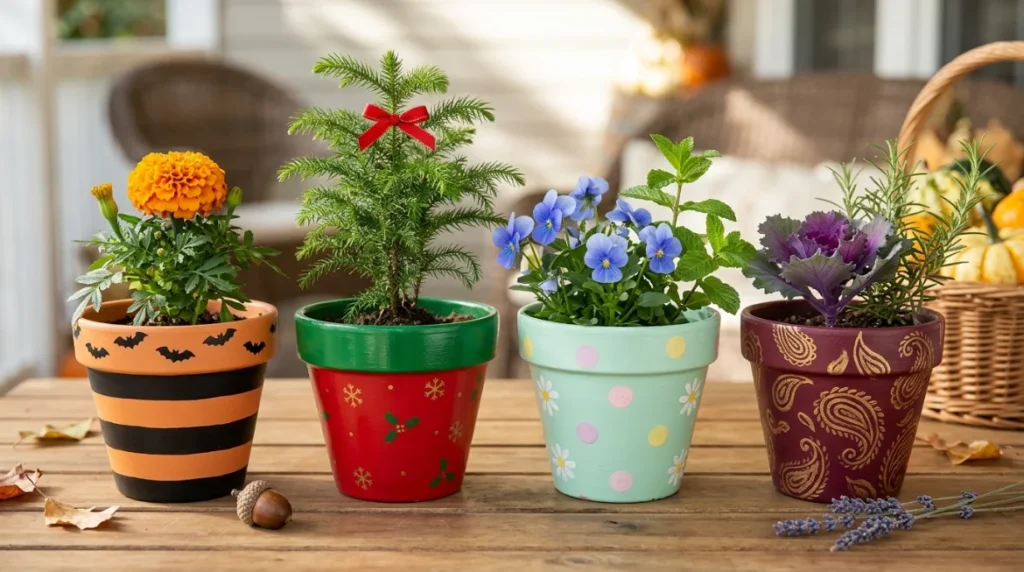
18. Seasonal and Festive Themes
Paint your pots to match seasonal decor: orange and black for Halloween, red and green for Christmas, pastels for spring, or deep burgundy and gold for autumn. Seasonal painted flower pots make beautiful table centerpieces or front door displays.
These also make very thoughtful handmade gifts, especially when paired with a plant or fresh herbs inside.
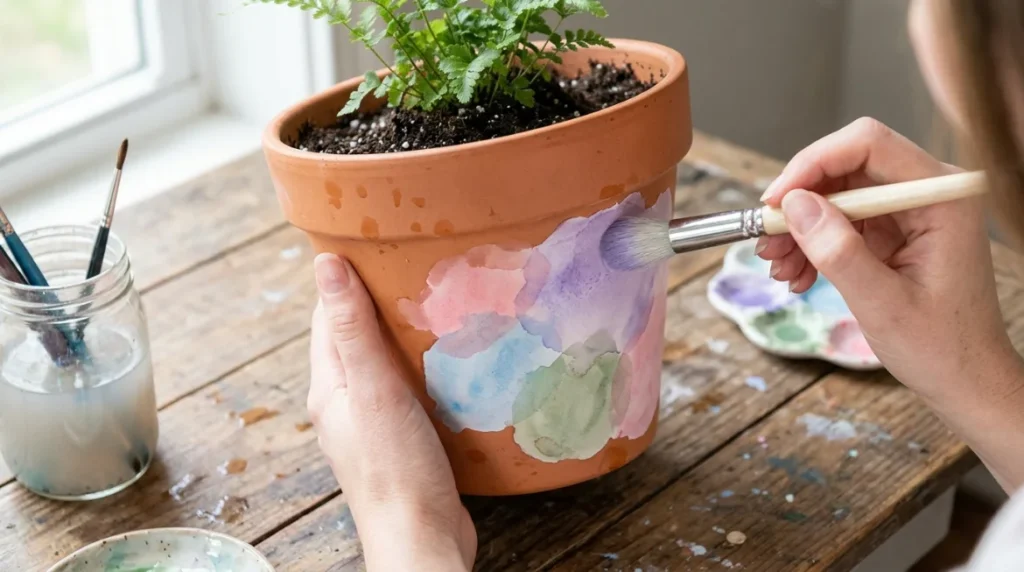
19. Watercolor-Style Wash

Watercolor-style painting on terracotta involves diluting acrylic paint significantly with water and applying loose, overlapping layers. The result is soft, slightly transparent, and painterly.
This technique works best in soft pink, lavender, sky blue, or sage green. It is one of the most visually refined DIY painted planters for home you can create, and the results look genuinely artistic.
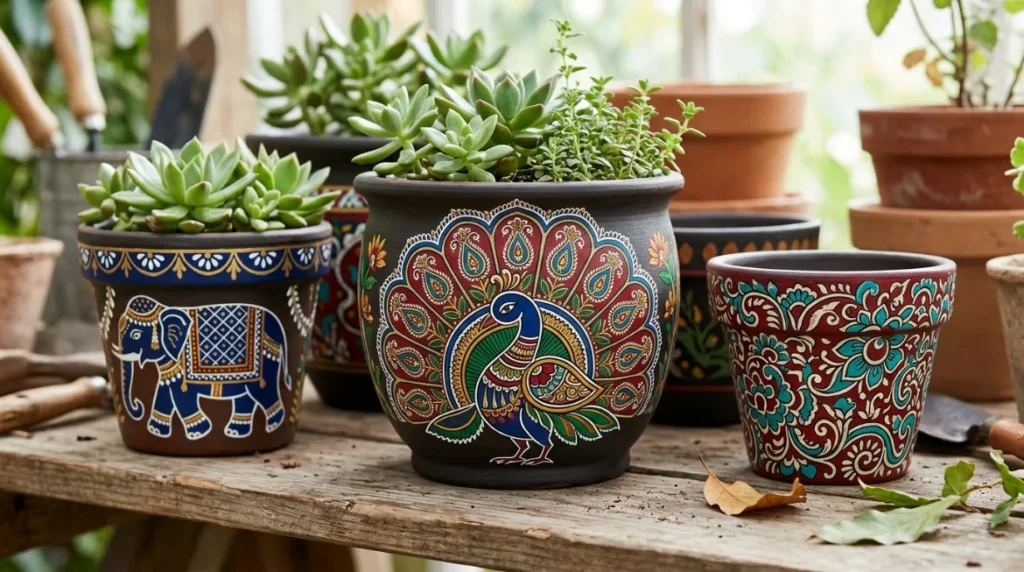
20. Cultural and Folk Art Patterns
Drawing inspiration from traditional folk art styles, you can paint intricate patterns featuring peacocks, flowers, elephants, or paisley motifs using bold, contrasting colors. These artistic planter designs are deeply personal and make each pot feel like a one-of-a-kind piece.
Rich colors like deep red, royal blue, gold, and white work especially well on a dark terracotta or black base.
Common Mistakes to Avoid When Painting Pots
- Painting a dirty or damp pot: Always clean and fully dry your pots before starting. Any moisture in the clay causes paint to lift or bubble.
- Using too few or too many coats: One thick coat often looks streaky. Multiple thin coats give a smoother, more even finish. Two to three coats is usually the sweet spot.
- Skipping the sealant: Especially for outdoor planter painting, skipping the sealant means your design will fade or chip within weeks. Sealing is not optional for pots exposed to rain or sun.
- Choosing indoor-only paint for outdoor pots: Regular craft acrylics are not designed for outdoor exposure. Use paint labeled for outdoor use, or apply a weatherproof sealant on top.
- Rushing the drying time: Patience is important. Each layer needs to dry fully before the next is applied. A heat gun or hair dryer on a low setting can speed this up.
- Over-complicating a design: A simple, well-executed design looks better than a complicated one done messily. Start easy, build confidence, then try more detailed patterns.
Indoor vs. Outdoor Painted Planter Ideas
For Indoor Plant Pot Decor
Indoor pots are not exposed to weather, which means you have more flexibility with paint types. Regular craft acrylic paint works perfectly. Keep designs refined and minimal for living rooms, or colorful and playful for kids’ rooms and kitchens. Painted terracotta planters with soft watercolor washes or botanical motifs look especially beautiful on wooden shelves or window ledges.
For Outdoor Planter Painting
Outdoor pots face sun, rain, and temperature changes. Always use outdoor-grade acrylic paint or at minimum seal your design with a UV-resistant, waterproof finish. Avoid placing freshly painted pots in direct sun while they cure. Darker base colors absorb more heat, which can stress plant roots in very hot climates, so lighter base colors are a safer choice for outdoor pots in warm regions.
Budget-Friendly Tips for DIY Pot Painting
- Buy a multipack of terracotta pots from a garden center. Small 4-inch pots are inexpensive and perfect for practice.
- Acrylic craft paint from a dollar store or discount craft shop works perfectly for indoor pots.
- Use sponges, old toothbrushes, and fork tines as alternative painting tools to create unique textures without special brushes.
- Mix leftover wall paint with white acrylic for a custom whitewash at no extra cost.
- Painter’s tape is affordable and reusable for multiple projects.
- One bottle of Mod Podge Outdoor or any clear sealant can protect multiple pots.
Conclusion
Pot painting is one of those DIY projects that feels much bigger than it actually is. With a few pots, some acrylic paint, and a couple of free hours, you can completely change the way your home or garden looks.
Whether you go with a clean, minimal solid color, an intricate boho mandala, or a charming animal face, every painted pot tells a little story about the person who made it. That is what makes these kinds of projects genuinely worthwhile.
Start with something simple. A solid color or a basic stripe is a great first project. Once you see how good it looks, you will want to paint every plain pot in sight. The ideas in this list are meant to meet you wherever you are, whether you are picking up a brush for the first time or looking for fresh inspiration for your next craft session.
Your planters are ready for a new life. All they need is a little color and your attention.
Frequently Asked Questions
1. What is the best paint to use for pot painting ideas?
Acrylic paint is the most recommended option for painted flower pots. It adheres well to terracotta and clay, dries quickly, and is available in a wide range of colors. For a matte, rustic finish, chalk paint is an excellent alternative. If you are painting outdoor pots, choose outdoor-grade acrylic or seal your finished design with a waterproof sealant.
2. Do I need to seal painted terracotta pots?
Yes, sealing is strongly recommended. A clear sealant protects your design from moisture, UV fading, and everyday handling. For outdoor planter painting, use a waterproof or UV-resistant formula. For indoor plant pot decor, a basic matte or glossy Mod Podge or craft sealant works well.
3. Can beginners do pot painting at home?
Absolutely. Some of the most popular pot painting ideas, like solid colors, stripes, ombre effects, and polka dots, require no artistic background at all. Painter’s tape helps you get clean lines without freehand skill. Starting simple builds confidence, and from there you can try more detailed patterns like mandalas or botanicals.
4. How many coats of paint do I need for a terracotta pot?
For most painted terracotta planters, two to three thin coats give the best result. A single thick coat often looks streaky or uneven. Let each coat dry fully before applying the next. Using a light primer coat first can reduce the total number of layers needed, especially for deeper or more vibrant colors.
5. Can I use painted pots outdoors?
Yes, but preparation matters. Use outdoor-grade acrylic paint or apply a weatherproof sealant over your finished outdoor pot painting. Avoid direct sun exposure while the pot is curing. A lighter base color is also a good choice for hot climates since darker colors absorb more heat, which can affect the plants inside.