
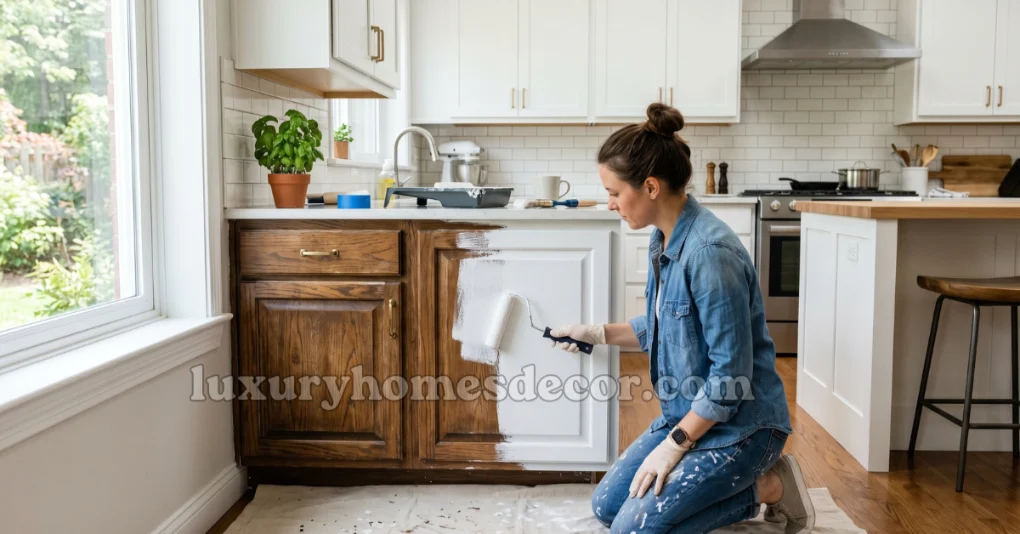
If your kitchen is looking tired and outdated, painting your cabinets is one of the smartest and most affordable upgrades you can make. A fresh coat of paint on your cabinets can completely transform the look of your kitchen without the massive cost of a full renovation.
Professional kitchen remodels can cost anywhere from $10,000 to $30,000 or more. Painting your existing cabinets yourself? You can get stunning results for under $200. That is the kind of home improvement project that makes a real difference without breaking the bank.
In this guide, you will learn exactly how to paint kitchen cabinets step by step, from prep work all the way to the final coat. Whether you are working with wood cabinets, laminate surfaces, or old painted cupboards, this guide covers everything you need to know to get a smooth, professional-looking finish right at home.
Why Painting Kitchen Cabinets Is Worth It
Before we get into the how, let us talk about the why. A lot of homeowners are hesitant to paint their cabinets because they worry about the results looking cheap or uneven. But when done correctly, painted cabinets can look just as good as brand new ones and sometimes even better.
Here are a few reasons why this project is absolutely worth your time:
It is incredibly cost effective. Replacing kitchen cabinets entirely can cost thousands of dollars. Painting them costs a fraction of that and delivers a dramatic visual transformation.
It adds real value to your home. An updated kitchen is one of the top features homebuyers look for. Fresh, clean cabinet paint can make your kitchen look modern and well-maintained, which increases your home’s appeal and resale value.
You can completely change the style. Going from dark wood stained cabinets to a crisp white or a trendy sage green can shift your entire kitchen aesthetic. It is one of the fastest ways to modernize an outdated space.
It is a manageable DIY project. You do not need professional skills or special equipment to get great results. With the right tools, the right paint, and the right technique, this is something any motivated homeowner can do over a weekend.
Choosing the Best Paint Color for Kitchen Cabinets
One of the most exciting parts of this project is choosing your color. The right cabinet color can set the entire tone of your kitchen, so it is worth spending a little time thinking it through before you commit.
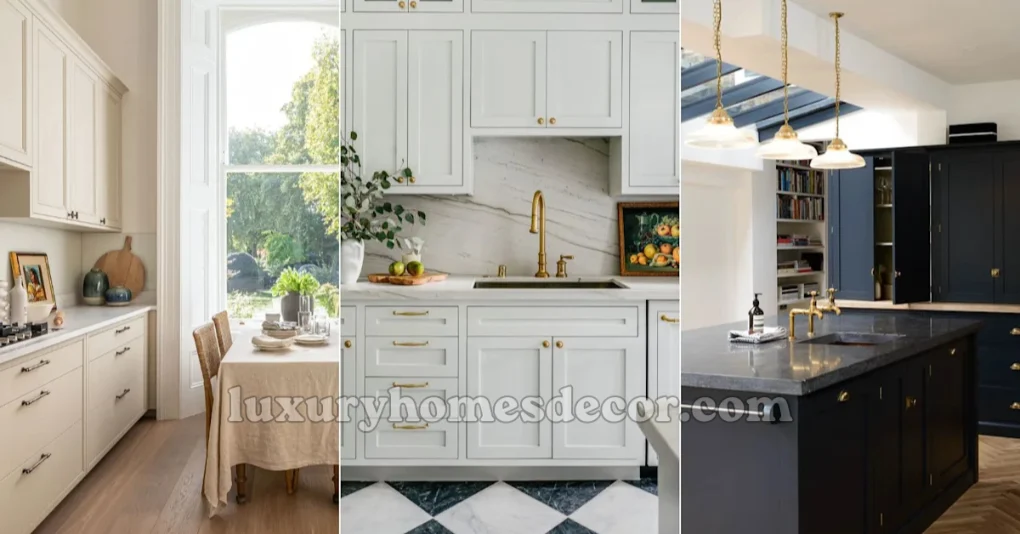
Here are some of the most popular kitchen cabinet colors right now in American homes:
White and off-white remain the most classic and timeless choices. They make kitchens feel bright, clean, and spacious. Shades like Sherwin-Williams Alabaster or Benjamin Moore White Dove are perennial favorites.
Sage green has become one of the most popular cabinet colors in recent years. It brings in a natural, calming vibe and pairs beautifully with wood accents and gold hardware.
Navy blue creates a bold, sophisticated look that works especially well in larger kitchens. It pairs well with white countertops and brass or chrome fixtures.
Greige — a blend of gray and beige is a versatile neutral that works in almost any kitchen style. It is warmer than straight gray but more modern than beige.
Charcoal gray gives kitchens a sleek, contemporary feel and pairs well with stainless steel appliances and light countertops.
When choosing your color, consider the natural light in your kitchen, the color of your countertops and backsplash, and the overall style you are going for. Always test a small sample patch before buying full cans.
What Tools Do You Need to Paint Kitchen Cabinets?
Having the right tools before you start is essential. Using the wrong brush or skipping key supplies is one of the most common reasons DIY cabinet paint jobs end up looking uneven or streaky.
Here is everything you will need:
Paint — Choose a cabinet-specific paint or a high-quality interior paint in a satin or semi-gloss finish. Brands like Sherwin-Williams Emerald Urethane, Benjamin Moore Advance, and Rust-Oleum Cabinet Transformations are popular choices.
Primer — A bonding primer is essential for getting paint to stick properly to cabinets, especially on laminate or previously painted surfaces.
Angled paintbrush — A good quality 2 to 2.5 inch angled brush is needed for detail work, edges, and corners.
Small foam roller — A 4 to 6 inch foam roller gives you a much smoother finish on flat cabinet surfaces than a brush alone.
Sandpaper — You will need 120-grit for initial sanding and 220-grit for light sanding between coats.
Liquid deglosser or TSP cleaner — For cleaning and deglossing cabinet surfaces before painting.
Painter’s tape — To protect walls, countertops, and hinges.
Drop cloths — To protect your floors and countertops from drips.
Screwdriver — For removing cabinet doors, hinges, and hardware.
Tack cloth or microfiber cloth — For wiping away dust before painting.
Plastic bags and labels — For keeping screws and hardware organized.
Cabinet Paint Comparison Table
| Paint Type | Best For | Finish | Durability | Dry Time |
|---|---|---|---|---|
| Latex / Water-based | Most cabinet types | Satin / Semi-gloss | Good | 1 to 2 hours |
| Oil-based | Wood cabinets | Very smooth | Excellent | 6 to 8 hours |
| Chalk paint | Vintage or farmhouse look | Matte | Moderate | 30 to 60 mins |
| Urethane-modified latex | High traffic kitchens | Smooth, hard finish | Excellent | 2 to 4 hours |
| Alkyd hybrid | Wood and MDF | Smooth | Very good | 4 to 6 hours |
| Spray paint / Aerosol | Small cabinets, touch-ups | Very smooth | Good | 20 to 30 mins |
Step 1 — Remove Cabinet Doors and Hardware
The first step to a professional-looking paint job is taking everything apart before you start. Painting cabinets while they are still hanging in place almost always leads to drips, uneven coverage, and paint on your hinges and hardware.
Use a screwdriver to remove all cabinet doors. As you remove each door, label it with a small piece of painter’s tape on the back write the cabinet number or location so you know exactly where each door goes back when you are done.
Remove all hinges, handles, and knobs. Place the hardware for each door into a labeled plastic bag. This small step will save you a lot of confusion when it comes time to reassemble everything.
Remove any drawers as well and take out the drawer fronts if they are separate pieces. Lay all your doors and drawer fronts flat on a clean work surface sawhorses with a sheet of plywood on top work great for this.
Step 2 — Clean the Cabinets Thoroughly
Cleaning is one of the most critical steps in this entire process, and it is also one of the most commonly skipped. Kitchen cabinets accumulate years of grease, cooking residue, and grime. If you paint over a dirty surface, the paint will not bond properly and will eventually peel or chip.
Use a TSP substitute cleaner or a liquid deglosser to wipe down every surface you plan to paint. Pay extra attention to the areas around handles and knobs, near the stove, and on the upper edges of lower cabinets where grease tends to collect.
After cleaning with a degreaser, wipe everything down with clean water and let it dry completely before moving on.
This step is non-negotiable. Clean cabinets are the foundation of a paint job that lasts.
Step 3 — Sand the Cabinet Surfaces
Sanding helps the primer and paint bond to the cabinet surface. You do not need to sand all the way down to bare wood just enough to rough up the existing finish so the new paint has something to grip.
Use 120-grit sandpaper to lightly sand all surfaces you plan to paint. Sand in the direction of the wood grain to avoid scratches. Pay special attention to any areas with chipping or peeling paint, as these need to be smoothed out before you prime.
After sanding, wipe everything down with a tack cloth or a damp microfiber cloth to remove all dust. Even small amounts of dust can cause bumps and texture in your final paint finish, so be thorough here.
For laminate cabinets, liquid deglosser can be used in place of sanding to prepare the surface. However, a light scuff with fine sandpaper still helps in most cases.
Step 4 — Apply Primer
Primer is not optional when it comes to painting kitchen cabinets. It creates a uniform base that helps the paint stick, improves durability, and ensures the final color looks true and even.
Choose a bonding primer specifically designed for cabinets and trim. Zinsser Bulls Eye 1-2-3 and Sherwin-Williams Extreme Bond Primer are two of the most popular options among DIYers and professionals alike.
Apply primer with your foam roller on flat surfaces and use your angled brush for edges, corners, and detailed areas. Apply a thin, even coat and let it dry completely according to the manufacturer’s instructions usually one to two hours for water-based primers.
Once the primer is dry, lightly sand the surface with 220-grit sandpaper to smooth out any raised grain or brush marks. Wipe away the dust with a tack cloth before moving on to paint.
Step 5 — Paint the Cabinet Boxes First
Before you paint the doors, start with the cabinet boxes the frames that are still attached to the wall. These are harder to work with and easier to do while the doors are out of the way.
Use your angled brush to cut in along all the edges and corners first. Then use the foam roller to cover the flat surfaces with smooth, even strokes. Work from the inside of the cabinet outward.
Apply thin coats rather than thick ones. A thin coat dries faster, looks smoother, and is far less likely to drip or sag than a heavy coat.
Let the first coat dry completely before applying the second. Most cabinet paints require at least two to three coats for full, even coverage.
Step 6 — Paint the Cabinet Doors
Lay your cabinet doors flat on your work surface. Painting them flat rather than upright prevents drips and gives you much better control.
Start by painting the back side of each door first. Use your brush for any recessed panels, grooves, and edges, then follow up with the foam roller on the flat areas. Let the back dry completely before flipping the door over and painting the front.
When painting the front of the door, work carefully around any raised panels or detail work. Use the brush to get into grooves and corners, then roll the flat areas for a smooth finish.
Apply two to three thin coats, lightly sanding with 220-grit sandpaper between each coat. This is the key step that separates a truly professional-looking finish from an amateur one.
Step 7 — Reinstall Doors and Hardware
Once your final coat is completely dry and ideally after the paint has had 24 hours to cure it is time to put everything back together.
Rehang each cabinet door using your labeled system to make sure every door goes back in its correct position. Reattach hinges, handles, and knobs. Step back and take a look at the full result.
If you notice any thin spots or small areas that need a touch-up, now is the time to address them with a small brush.
you may also like this: 17 Stunning Kitchen Design Ideas to Transform Your Space 2026
How to Paint Cabinets Without Brush Marks
Brush marks are one of the most frustrating outcomes of a DIY cabinet paint job. Here is how to avoid them:
Use a foam roller for flat surfaces. Foam rollers leave a much smoother finish than bristle brushes on flat cabinet faces and doors.
Thin your paint slightly if needed. Adding a small amount of Floetrol to latex paint improves flow and reduces brush marks significantly.
Use a high-quality brush. Cheap brushes leave bristle marks. Invest in a good synthetic bristle brush for cutting in and detail work.
Apply thin coats. Thick coats are more likely to show brush and roller marks. Multiple thin coats always look better.
Sand lightly between coats. A quick pass with 220-grit sandpaper between each coat smooths out any texture before the next coat goes on.
Common Kitchen Cabinet Painting Mistakes to Avoid
Even experienced DIYers make these mistakes. Knowing them in advance will save you a lot of frustration.
Skipping the cleaning step is the number one mistake. Grease and residue on the surface will prevent paint from bonding, leading to peeling and chipping within months.
Not using primer leads to uneven color, poor adhesion, and paint that wears off quickly around high-touch areas like handles and edges.
Applying paint too thick causes drips, sagging, and a finish that never looks quite right. Always go thin.
Not sanding between coats leaves a rougher texture with each additional coat. A light sanding between coats is what creates that ultra-smooth finish.
Rushing the dry time is tempting but will ruin your results. Paint that is not fully dry before the next coat goes on can peel, bubble, or stay tacky for weeks.
Painting in cold or humid conditions affects how paint dries and bonds. Try to paint in temperatures between 50 and 85 degrees Fahrenheit with moderate humidity for best results.
Kitchen Cabinet Makeover on a Budget
You do not need to spend a fortune to get great results. Here is a rough breakdown of what a complete DIY cabinet painting project might cost:
A quart of bonding primer typically runs between $15 and $25. A quart of quality cabinet paint costs around $25 to $45. Sandpaper, tape, a foam roller, and brushes will add another $20 to $40. New hardware like handles and knobs is optional but can make a big difference budget $30 to $80 depending on how many cabinets you have.
In total, you can complete a full kitchen cabinet makeover for somewhere between $90 and $200. Compare that to the cost of new cabinets, and the value of doing it yourself becomes very clear.
FAQs
1. Do I need to sand cabinets before painting?
Yes, light sanding is highly recommended. It roughs up the existing surface so the primer and paint can bond properly. You do not need to sand all the way down to bare wood a light scuff with 120-grit sandpaper is enough for most cabinets.
2. What is the best paint finish for kitchen cabinets?
Satin and semi-gloss are the most popular finishes for kitchen cabinets. They are durable, easy to clean, and hold up well to the moisture and grease that kitchens produce. Avoid flat or matte finishes, which are difficult to wipe clean.
3. How many coats of paint do kitchen cabinets need?
Most kitchen cabinets need two to three coats of paint for full, even coverage. Always let each coat dry completely and sand lightly between coats for the smoothest possible finish.
4. Can I paint laminate kitchen cabinets?
Yes, you can paint laminate cabinets, but proper prep is essential. Clean thoroughly, use a liquid deglosser or light sandpaper to scuff the surface, and apply a bonding primer before painting. Without these steps, paint on laminate will peel quickly.
5. How long does it take for cabinet paint to dry?
Water-based latex paints are typically dry to the touch within one to two hours. However, full cure time when the paint reaches its maximum hardness can take two to four weeks. During this curing period, handle the cabinets gently and avoid harsh scrubbing.
6. Can I paint cabinets without removing the doors?
Technically yes, but the results will not look as good. Removing doors allows you to paint flat surfaces more easily, avoid drips, and get into all the edges and corners properly. If possible, always remove the doors for a cleaner finish.
Final Thoughts
Painting your kitchen cabinets is one of the most impactful and budget-friendly home improvement projects you can take on. When done right, the results are genuinely stunning a kitchen that looks completely transformed without the cost or disruption of a full renovation.
The key to success is patience and preparation. Take the time to clean, sand, and prime properly before you ever open a can of paint. Apply thin coats, sand between each one, and let everything dry fully before moving on.
Follow the steps in this guide, avoid the common mistakes, and you will end up with a kitchen that looks like a professional did the work because you did it right.